Split Detail View in Revit
Creating a Split Detail View in Revit is super easy!
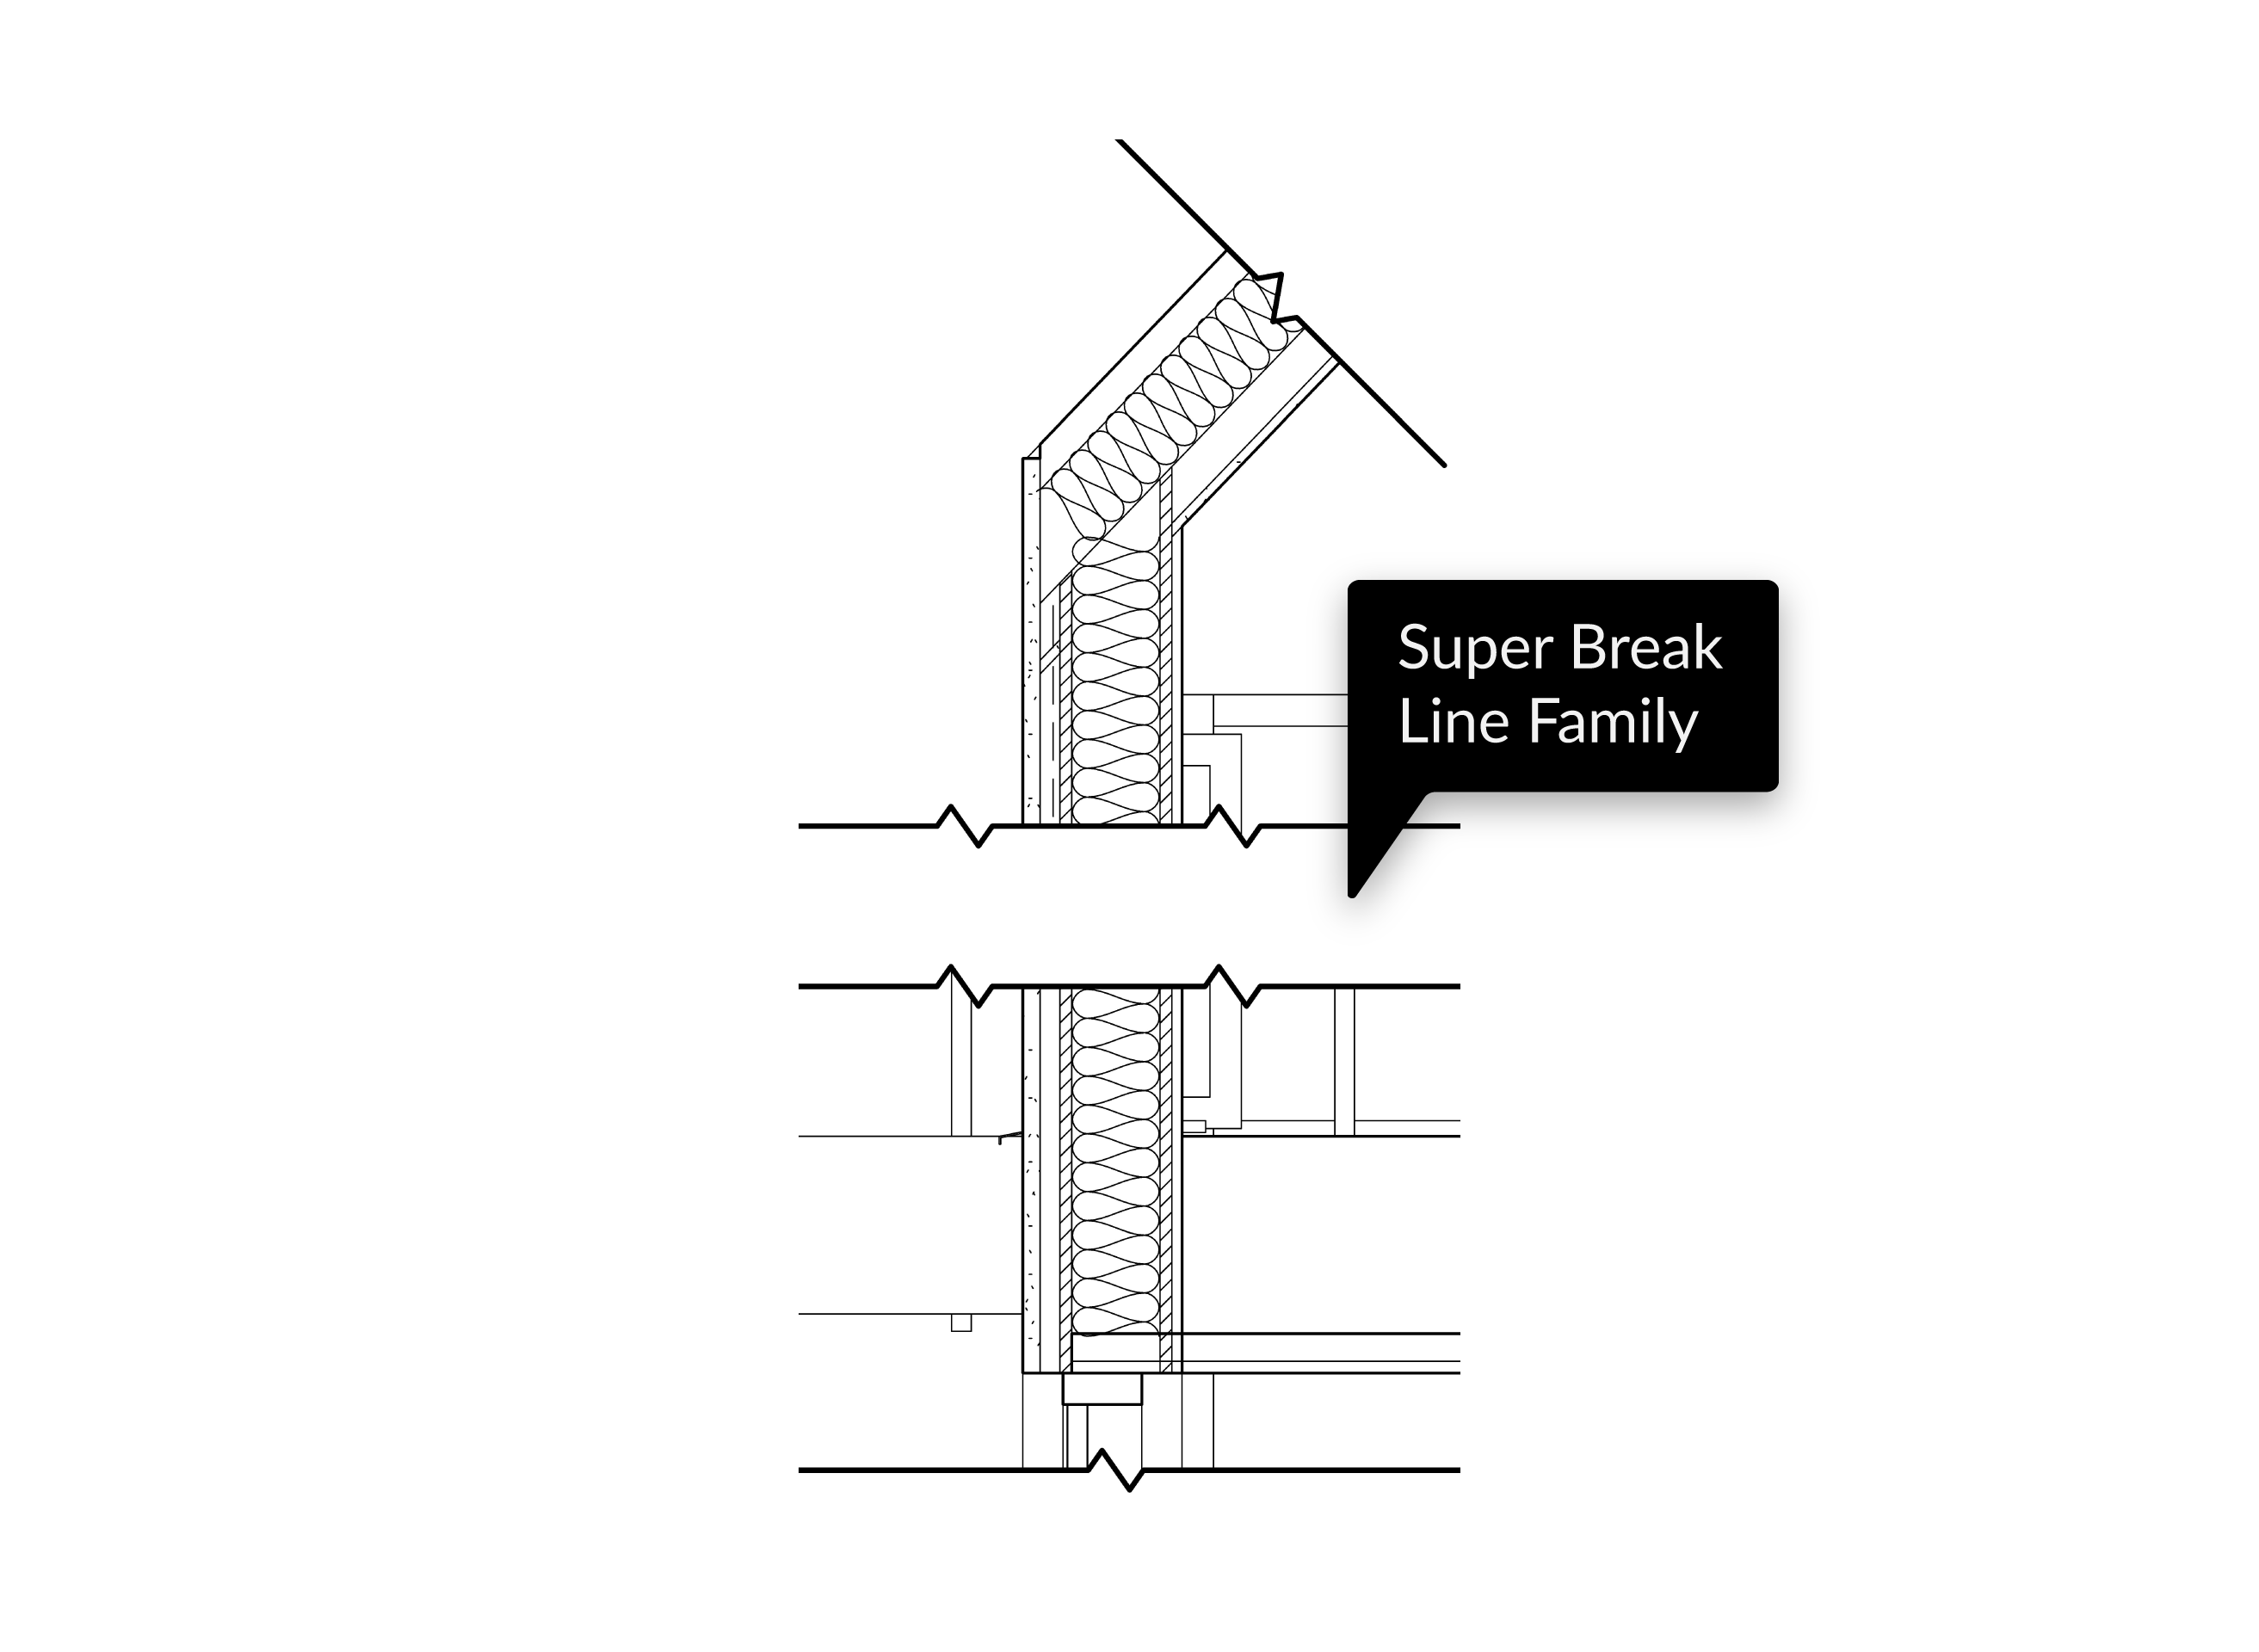
Use our Revit Breakline Family to it even faster!
One useful feature of Revit is the ability to create a split detail view, which allows you to show multiple levels of detail in a single view. In this article, we'll walk through the steps to create a split detail view in Revit.
Step 1: Crop the view
The first step is to adjust the crop region to get a closer look. In the Properties Palette, you can adjust the scale of the view to show more or less detail. This will depend on the complexity of the model and the level of detail you want to show.
Step 2: Add Detail and Annotation
You can add annotations to the split detail view, such as dimensions, text, and symbols. To add annotations, simply select the Annotation tool from the ribbon and add them to the view.
Step 3: Add a Break Line
Add a Break Line to each End of the drawing, use the space bar to rotate and match any special angle
Step 4: Add a middle Break Line
This one is our special Break Line Revit Family - created to save time: use the Two Sided Break Line to mask the middle area of the drawing. Don't worry if it is too large now, it will become shorter once we split the view
Step 5: Create the split
To create the split detail view, select the crop region and click on the small lighting symbol. This will create a horizontal or vertical line in the view, depending on where you click.
Step 6: Adjust the final Detail drawing
You can drag one part of the split drawing to the other by clicking and dragging the small arrows that appear in the middle of each part
Creating a split detail view in Revit is a simple process that can greatly enhance the clarity and detail of your 3D models. By following these steps, you can easily create a split detail view that shows multiple levels of detail in a single view.
Follow the steps in tutorial down below to create one:
Download our Super Break Line Family:


Leave a comment