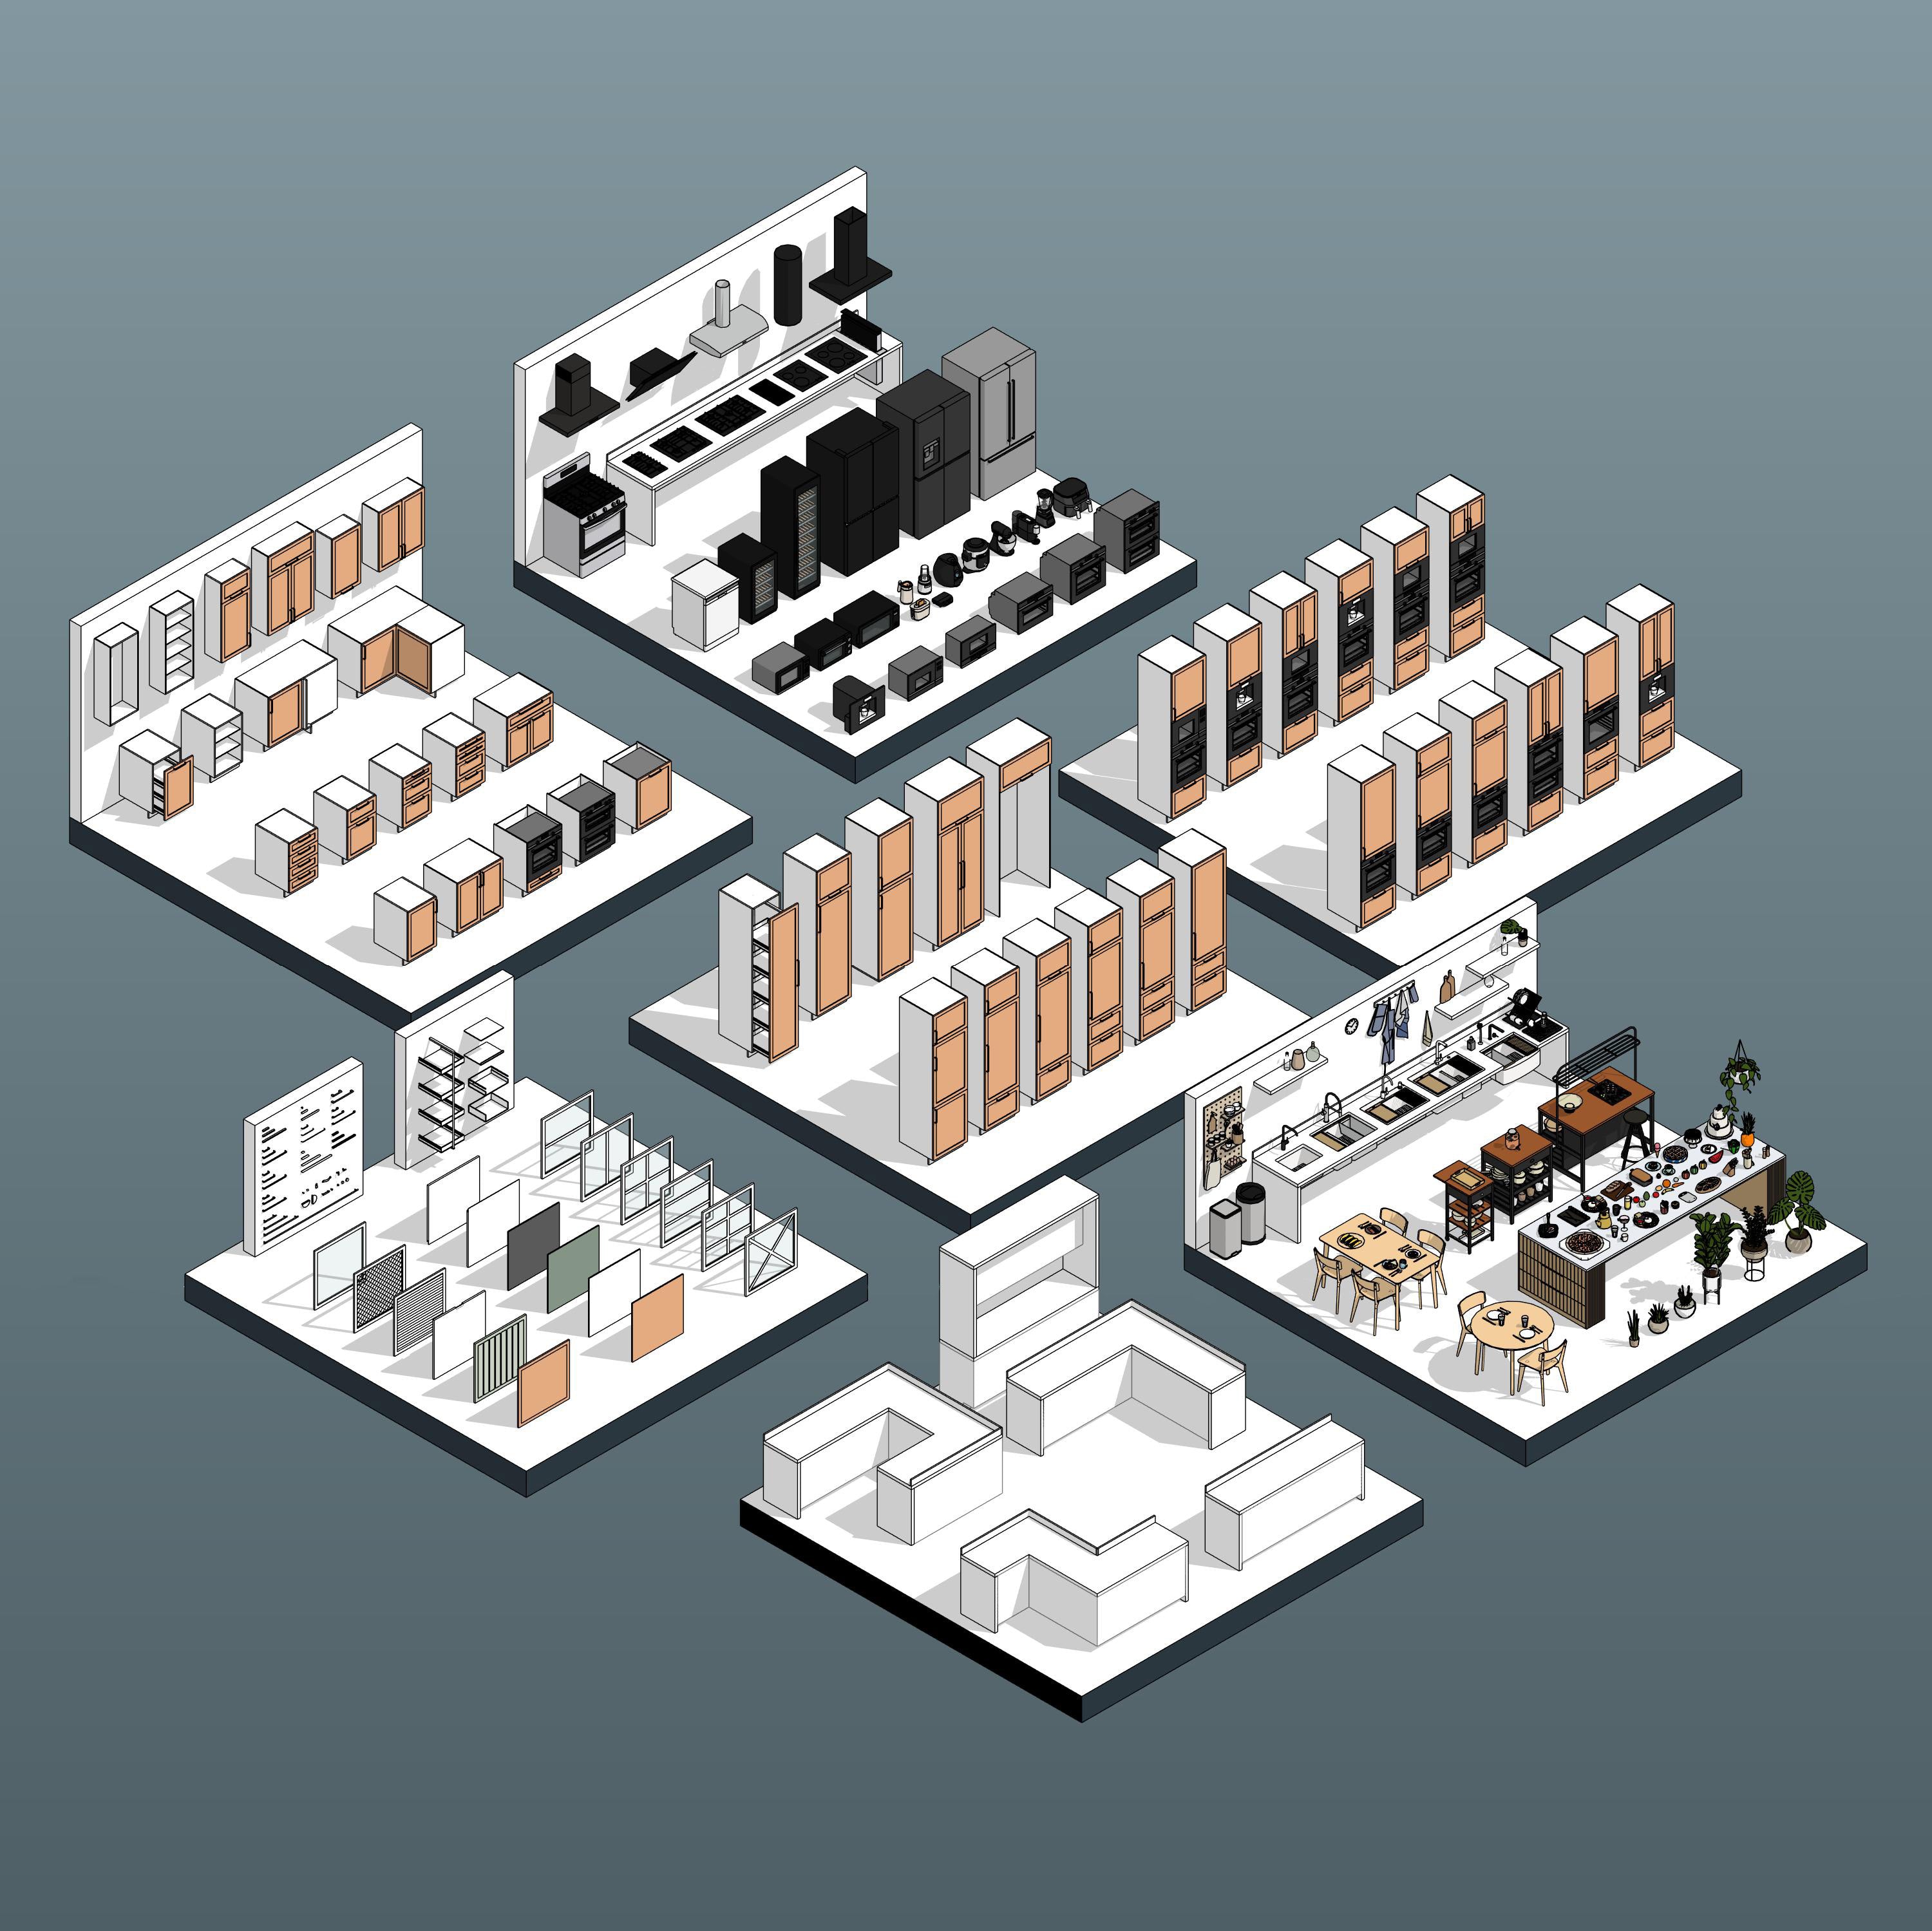
Pro Kitchen Families | Complete Tutorial
Step 1: Layout
Choose your Kitchen Layout:
- Linear
- L-Shape
- U-Shape
- Z-Shape
- Box
- Add a Kitchen Island with the Linear Countertop

To change the dimensions of the Countertop simply drag the shape arrows or type in the desired dimensions in the Properties Panel:

Turn on or off the Countertop Legs, Backsplash and Countertop Profile:

The Countertop Depth, Height and Thickness are Type Parameters:

Materials are also Type Parameters:

Step 2: Base and Top Cabinets
2.1 Base Cabinets
Place the Base Cabinets, you can also add an Integrated Oven Cabinet or a Dishwasher (Available in the Professional Package). If you are working with a non Linear Layout, don't forget to start from the Corner Cabinets.

Choose the base: Toe Kick base or Legs

When dealing with open corners, you can tick the Right / Left corner to create a setback (Offset):

Check the Type Properties to change the legs / toe kick height, depth and side depth:

You can also choose between Rectangular Leg and Circular one:

Change the Cabinet Depth if needed: Duplicate Type and change the Depth Parameter

Change the Width and Height from the Properties Panel:

2.2 Top Cabinets
Top Cabinets are the same as the Base Cabinets, minus the toe kick part / legs, usually with a thinner depth. Use the Elevation from level to move them up, usually it starts from 140 cm off ground level:


2.3 Door Facade
Choose the Door Façade Type from the Properties Panel, you may choose more than one cabinet at once (the wonders of Shared Parameters):


There's a catalogue of 18 Facades to choose from:

Choose the opening direction, there are 5 options: Bottom, Left, Right, Up and Drawer Opening:

2.4 Handles
Choose the Handle Type from the Properties Panel:

There are 20 Handle Types and you can create more!

It's extremely important NOT to Delete the "RD_Handle - Empty" Family.
To create a new Type, choose a Handle Family, Right Click to Duplicate a Type and change dimensions, material and other parameters.

Handle position is controlled by an X and Y Offset Parameters from the Properties Panel, the measurement is always from the Handle center:

For Two Door Cabinets, there are multiple choices for the Handle Position: Top, Middle and Bottom

For Cabinets combining Doors and Drawers, there are multiple choices for the Handle Type and Position:

Step 3: Drawers, Shelves and details
3.1 Drawers
Cabinets with drawers are very easy to adjust. The Cabinet with Equal number of drawers simply divides the Cabinet Height into X equal drawers:

The Cabinets with unequal drawers allow to adjust each drawer height individually while the upper drawer height is the result of the Cabinet Height - Other Drawers Height. The numbering of the drawers begins from the bottom up:

Each drawer could be opened to demonstrate its depth in 3D views, Renders and sections:

Drawer Interior part could be turned on and off, and changed too:

3.2 Pull-Out Larder
A Pull-out larder cabinet could be used as a base cabinet or a tall one.
Pull-out larder cabinet includes a parametric inner drawers unit where you can control the number of drawers, height of each drawer and top offset. Please note that the drawer height parameter refers to the storage space of the drawer.
Adjust the number of inner drawers:

Adjust the drawer height (storage space):

Adjust the Top Offset:

3.3 Shelves
Shelves could be turned on and off, and choose the shelves number from the Properties Panel. Use the Coarse Detail Level to work on the interior parts of the cabinets:

Adjust the shelf depth and choose the shelves Type: Simple or L-Shape

Step 4: Tall Cabinets
Tall Cabinets could be found in both the Advanced and Professional Package.
There are two groups of Tall Cabinets: Tall Cabinets (Advanced Package) and Tall Cabinets with integrated Oven and Microwave (only in the Professional Package).

4.1 Tall Cabinets Doors and Handles
Picking the Door and Handle type is similar to the Base Cabinets. For each Tall Cabinet there are more than one option to make it possible to create separate custom designs for the drawer parts, swing doors and top parts.
There are 3 Door Types to pick:

There are 3 Handle Types to pick:

4.2 Tall Cabinets Dimensions
Cabinet dimensions are set in a way that the Top Part is always the result of the calculation: The Cabinet Height - Lower Parts. You can adjust the Drawers Height and Middle Swing Door from the Properties Panel:

4.3 Integrated Oven and Microwave
The Integrated Oven and Microwave are also nested Families with multiple Materials:

The Oven and Microwave Families are placed according to the height of the lower parts (in this case, two drawers).
Their Height could be adjusted too:

You may swap the Microwave Family for another Oven and get a Tall Cabinet with two Ovens:

Step 5: Appliances and Plumbing Fixtures
You can find them all in the Electrical Equipment and Plumbing Fixtures Categories. Most Families are Face-Based to quickly place it on top of surfaces.

Also, most Families have their dimensions as instance parameters to quickly adjust the objects:

Step 6: Graphics
This is our favorite part! Use the Detail Level settings to build and design the kitchen part by part.
Coarse Detail Level: To create the basic Kitchen Structure, choosing the number of shelves, drawers, rough dimensions and placement of cabinets. Also, use the Coarse Detail Level to place Kitchenware inside the Cabinets.
Medium Detail Level: To work on door opening directions, type of Panels and, materials and Kitchen appliances.
Fine Detail Level: To work on fine-tuning the Kitchen Handles: their Type, materials, dimensions and final placement.

Elevation Graphics: choose between a clean façade or showing the opening lines:

Floor Plan Graphics: choose between hidden lines, simple drawing or detailed drawing:

Cabinet Opening Lines: choose between no lines, or pick the opening angle:

Step 7: Furniture and Entourage
Make the most out of the Professional Kitchen Pack to create interesting and realistic scenes. You can find them all in the Furniture, Generic Model and Planting Categories. Most Families are Face-Based to quickly place it on top of surfaces.

Pro Tips
When placing a sink over a Base Cabinet, make sure to remove the Base Cabinet Top Panel:

You can always make custom combinations from the Base Cabinets to create new Tall Cabinets:


